Wikipedia:Preparing images for upload
| This page documents an English Wikipedia editing guideline. Editors should generally follow it, though exceptions may apply. Substantive edits to this page should reflect consensus. When in doubt, discuss first on this guideline's talk page. |
When uploading image files to Wikipedia or, preferably, to the Wikimedia Commons, it is important to use the right file format for the content. Don't try to save disk space on the images server by giving up useful information.
Keep the source:
- If the image was generated from data (e.g. a graph in Microsoft Excel), the data and file (e.g. spreadsheet) should be included so new data can be added to the graph, and/or the source of the data should be cited.
- If the image was generated from a script (e.g. in a computer algebra system), the code should be included so minor improvements like labels and color adjustments can be made.
- In any of the above cases, there should be a note saying what specific software is required to edit the image. Data formats and code that are compatible with free software should be preferred.
There are 4 basic choices for image file formats:
- SVG for simple diagrams (especially those that need to be scaled).
- JPEG for photographic images.
- GIF for animated images.
- PNG for everything else.
While some formats offer multiple compression systems, in general the format and the compression system are tied together.
Other image formats should be avoided in most cases:
- BMP - Images are uncompressed, resulting in larger file sizes. Should usually be converted to PNG.
- TIFF - Should usually be converted to PNG or JPEG as discussed above.
Diagrams
The editability and scalability of SVG (Scalable Vector Graphics) make the format the obvious choice for graphic representation of data and illustrations. However, it is not always easy to convert raster images like GIFs, PNGs, or JPEGs to SVG, and some images (especially photos) are not conducive to this treatment. If a diagram cannot be produced in SVG, then a PNG image is preferred over a JPEG.
The PNG compression algorithm is designed to work with large areas of solid colour that have sharp boundaries. It is therefore a good format for diagrams and cartoons. But it does not automatically give you the smallest possible file size. There are some things that need to be done by hand.
There is a delusion among many web designers that PNGs are larger than GIFs. This delusion originates from two facts:
- Many people compare a 24 bit PNG with an 8 bit GIF, which is an invalid comparison.
- Adobe Photoshop has historically been known as being poor at creating[clarification needed] PNG files.
Choose a colour depth appropriate for the number of colours

| ||
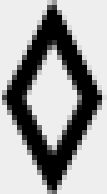
| 1-bit colour No anti-aliasing 180 bytes |
4-bit colour Anti-aliased 309 bytes |
Enlarged view of anti-aliased image |
|---|
Does the number of bits per pixel fit the number of colors in the image? Diagrams usually have few colours. If a diagram has 4 colours, there is no need to store it in a 24-bit (truecolour) format capable of distinguishing 16 million colours. The lower colour depth versions of PNG store colours in a palette. Paletted images can have a bit depth of 1, 2, 4, or 8 bit (2, 4, 16, or 256 colour). Use the lowest bit depth that can handle all colours in your image, although some image editing programs cannot create 2-bit colour images.
If you are converting an image with many colours (perhaps because somebody saved the original as a JPEG, avoid this) to a PNG, you may want to reduce the number of colours at the same time; see Wikipedia:How to reduce colors for saving a JPEG as PNG.
An anti-aliased image may use more colours than you notice, because anti-aliasing smooths jagged edges by adding shades of grey where once there was black or white. Anti-aliased black-and-white images usually need to be saved as 16-colour or 256-colour images instead. See the illustration at the right.
Do not save diagrams as JPEG

|

|
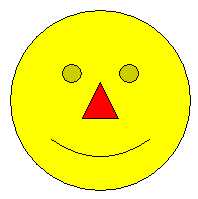
| Image showing lossy JPEG compression |
Enlarged view showing compression artifacts |
|---|
To the right is an example of a file saved as JPEG when it should have been saved as PNG. JPEG uses lossy data compression meant for photographs. Compressing drawings or diagrams with JPEG results in an image of poor quality, because the human eye can spot the compression artifacts around the edges.
Another drawback is the large file size you will end up with. JPEG compression has many options but most commonly only two colour spaces: 24-bit RGB (8 bits per sample) and 8-bit greyscale. Most importantly, JPEG by its nature cannot support indexed colour. In the example on the right, a 4-colour image is inflated by using an inappropriate colour schema, which results in the rather large file size.
If you do not have an original file but only a JPEG that really should be a PNG, do not simply save the JPEG as PNG because this will result in an even larger file. There is a nice tutorial at Wikipedia:How to reduce colors for saving a JPEG as PNG.
Use SVG over PNG

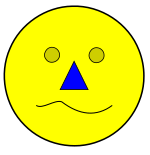
|

|

|
| Expanded PNG | Expanded SVG | Simple changes to SVG |
PNG is a raster graphics format, encoding the value of each individual pixel, while SVG is a vector graphics format that encodes an image as a series of geometric shapes. If this confuses you, don't worry; you don't need to understand the technical aspects to create or upload images. What this means in practice is that an SVG image scales to different sizes far better than an equivalent PNG. Therefore, for images that consist largely or entirely of polygons, lines, and curves (national flags, road signs, etc.), SVG is the preferred format. Shown here are two example enlarged crops of an image, one in PNG format, one in SVG format showing higher quality.
SVGs can be easily created with many desktop publishing programs such as the free Scribus program. SVGs can also be altered simply with a text editor, because it is code-based, not numerical. This makes updating and translating illustrations much easier. Users having problems with uploaded SVG images may ask for assistance at Wikipedia:SVG Help. For a list of SVG editing software, see List of vector graphics editors.
JPEG tips
As stated above, JPEG (Joint Photographic Experts Group) was developed with photographic images in mind. Although the JPEG algorithms are quite good, there are a couple of tips that will help to get the smallest file size possible without sacrificing quality:
- Some digital cameras and smartphones store additional information (known as EXIF metadata) in the JPEG files they create. Be aware that all such metadata is publicly visible across Wikipedia and Wikimedia. If you don’t want to reveal the information remove it from the file before you upload it using an appropriate application.
- When saving a JPEG, the graphics program will let you choose the compression level. Usually the values range from 0 to 100 where 100 is the best quality possible with very little compression applied. Some apps, notably Paint Shop Pro, reverse this scale with 0 as highest quality and 100 as the lowest quality. Don't mistake the 0 to 100 scale for a percentage, in that using 1/2 the setting does not result in 1/2 the quality, nor does it produce a file of 1/2 the size. Also, 100 does not mean "100%", as the image is still compressed, resulting in a minute loss of detail. Since most JPEGs in Wikipedia will be rescaled anyway before appearing on pages, a quality setting of 95 is appropriate. (Settings above 95 increase size dramatically for little improvement in image quality.)
- JPEG compression works better on slightly blurred images, so don't sharpen the images too much as it will result in a higher footprint.
- Always work from the original image and not from the already saved JPEG file, as quality gradually decreases the more you save it; this is known as digital generation loss. For this reason, it may be good to keep the main copy here in a lossless format like a raw image format or PNG. However, as of right now, scaled versions are forced to be in the same format as the original image and having two copies of the image is a maintenance nightmare.
- Existing JPEG files can be compressed a bit more, with no additional loss in quality, using
jpegtran -optimize. This results in a smaller file, but the compression is slower. Jpegtran is part of libjpeg. A package called littleutils contains a script calledopt-jpgthat automates JPEG optimization, usingjpegtranas the underlying engine. - JPEG files can also be losslessly optimized with JPGExtra, which removes all hidden "extras" (or metadata) from the files without affecting the image data.
- Graphics programs also allow you to reduce the image to a particular size before saving. If images are for use in infoboxes only, and are being used under fair use rules, they should not be any larger than the size displayed, e.g. 220–300 pixels wide. For album covers, see Template:Infobox album#Cover.
PNG tips
Images that are not photographs, such as diagrams and screen captures of applications or older video games, use few colors. If it makes sense, save the image in indexed mode. A truecolour PNG can often be converted to indexed mode without changing the look of the image, while saving on file size. (See color depth for information on indexed mode and truecolour.)
It is normal for image editing programs to produce poor PNG compression, even when run with their maximum compression choices. As a result, there are a variety of tools to compress PNGs without any loss of quality. However, if the image will be scaled by Mediawiki before viewing, then these steps are pointless. Some such tools and information on using them is shown below.
- PNGOUT (gratis)
- pngcrush (open source)
- OptiPNG (open source), fork of pngcrush
- AdvDef/AdvPNG, part of the AdvanceCOMP compilation (GNU GPL)
- DeflOpt (gratis)
- Zopfli (open source)
- pinga (with GUI)[1] / pingo (CLI)[2]
OptiPNG usually outputs smaller files than pngcrush, as the latter preserves some information to strictly follow the PNG specification.[3] AdvDef can be used after either of them to further improve the results. AdvDef is straightforward to use, as it optimizes only the compression itself. Zopfli tends to achieve better compression ratios than pngcrush or OptiPNG, but takes significantly longer to run.[4][5]
For quick compression, simply use OptiPNG with no options at all:
optipng file.png
If smallest results are desired and time is not important, a chain of this sort produces even smaller possible results:
optipng -o7 file.png
advdef -z4 file.png
pngout /ks file.png
deflopt file.png
Each of these utilities uses a different, more sophisticated "deflate" compression method variant on the PNG and generally produces a smaller file when run after the other tools. If the smallest result matters, try some experimenting to see what produces the best result.
After any compression, the image should be compared to the original. It's occasionally the case that quirks in the original cause transparency to be lost even in compression which is intended to be lossless. This commonly, but not always, shows up as a change in the background colour that is obviously visible at a glance.
For quick-and-dirty optimization, the opt-png script (found in the littleutils package) can be useful. It automates PNG optimization, utilizing pngcrush and a variant of pngrewrite as underlying engines to achieve results similar to that of optipng.
Note also that these chains, particularly the pngrewrite step, will discard non-image blocks, often including copyright or creator details. Check the pngrewrite and other program options if you want to preserve this information.
PNG files can also be losslessly optimized with PNGExtra, which removes all hidden "extras" (or metadata) from the files without affecting the image data.
References
- ^ "pinga, GUI image optimizer (PNG/JPG)". css-ig.net. Retrieved 2022-09-05.
- ^ "pingo, image optimizer for web". css-ig.net. Retrieved 2022-09-05.
- ^ "pngcrush and optipng notes". png-mng-implement (Mailing list). 2008-04-15. Archived from the original on 2012-03-05. Retrieved 2014-03-27.
- ^ "Compress data more densely with Zopfli". Google Developers Blog. Archived from the original on 2 November 2020. Retrieved 2020-11-02.
- ^ "Zopfli Optimization: Literally Free Bandwidth". Coding Horror. 2016-01-02. Archived from the original on 2 November 2020. Retrieved 2020-11-02.

